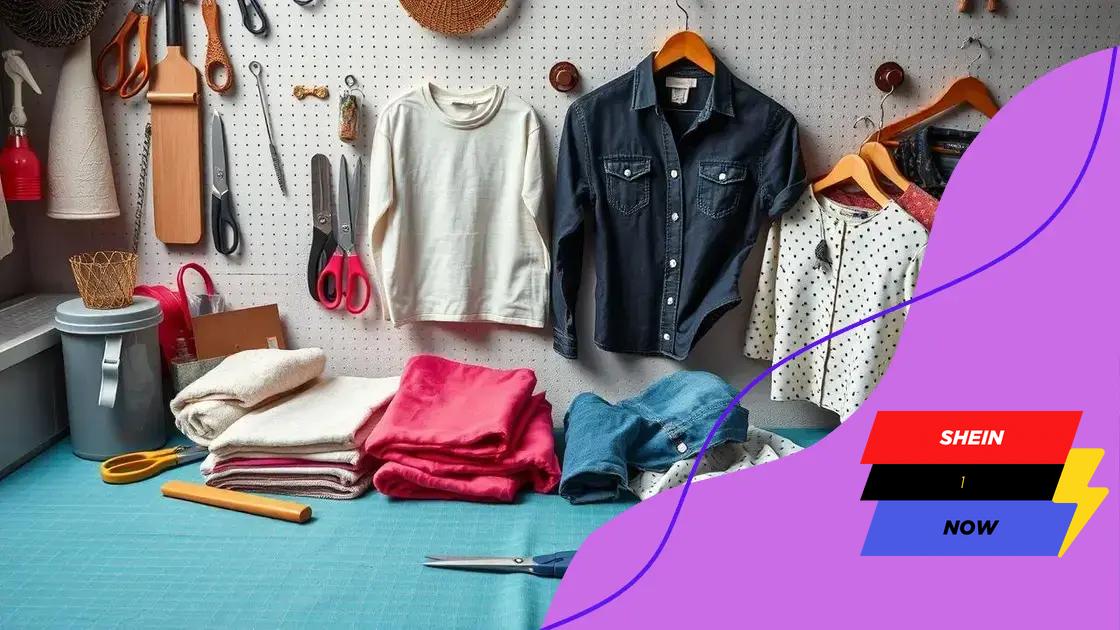
Shein’s tutorials for DIY fashion customization
Sharing your DIY creations through social media, blogs, and workshops not only inspires others but also fosters community engagement and personal creativity in the world of fashion customization.
Shein’s tutorials for DIY fashion customization open up a world of creative possibilities for those looking to personalize their wardrobe. Have you ever wanted to transform your style with unique touches? Let’s dive into how you can make your fashion truly yours!
exploring the basics of DIY fashion
When you think about DIY fashion, it’s all about creativity and personal expression. Exploring the basics of DIY fashion can empower you to transform your wardrobe. Understanding different techniques will elevate your style and allow you to showcase your personality through unique clothing pieces.
Essential Techniques for DIY Fashion
Starting with basic techniques can lead to amazing results. From simple alterations to creative embellishments, there’s so much you can do. Here are some essential methods that you can easily learn:
- Hem altering: Change the length of skirts, pants, or dresses to fit your size.
- Adding patches: Customize your clothes with fun patches for a personal touch.
- Fabric dyeing: Experiment with color to revive old clothes or make them unique.
- Embroidery: Add intricate designs to enhance your garments.
Each technique can be learned through tutorials, and the best part is that they are often easy and inexpensive. As you practice, your skills will improve, and you’ll gain confidence to tackle more complex projects.
Choosing the Right Materials
Choosing the right materials is key to a successful DIY project. First, look for fabrics that are easy to work with, such as cotton or linen. They can be altered easily and are comfortable to wear. Additionally, don’t forget to gather high-quality tools, including scissors, needles, and threads that match your fabric.
Getting to know your materials can inspire your creativity. Visit local fabric stores to explore different textures and colors. You may find remnants that are discounted, perfect for your first projects.
When you engage in DIY fashion, you’ll not only learn valuable skills but also create pieces that reflect your style. Embrace the process, and let your creativity shine as you explore the endless possibilities that DIY fashion offers.
tools and materials you need for customization
When diving into customization, having the right tools and materials is crucial for achieving the best results. The journey into DIY fashion becomes smoother with the right equipment. Whether you’re altering clothing or creating something entirely new, knowing what to use makes a significant difference.
Essential Tools for Customization
Here are some basic tools that anyone interested in DIY fashion should have:
- Scissors: A good pair of fabric scissors is necessary for clean cuts.
- Seam ripper: This tool is perfect for removing stitches that need fixing.
- Measuring tape: Accurate measurements will ensure your adjustments fit perfectly.
- Sewing machine: While hand sewing is an option, a machine makes the process faster and neater.
Having these tools on hand simplifies the customization process, helping you to work more efficiently and effectively.
Choosing the Right Materials
Aside from tools, selecting the right materials is vital for your projects. Depending on your idea, you’ll want to gather:
- Fabrics: Choose types that suit your project, like cotton for simple alterations or denim for more substantial projects.
- Threads: Ensure you have a variety of thread colors that match or contrast your fabric beautifully.
- Buttons and embellishments: Adding unique buttons or decorative items can enhance your creations.
- Iron-on patches: These make adding designs quick and easy without sewing.
All these materials can be found at craft stores or online. The right combination will help your vision come to life while ensuring quality and durability in your custom pieces.
Embracing DIY fashion means exploring options and experimenting. With the proper tools and materials, you can easily discover new ways to express your personal style through customization.
step-by-step guide to unique clothing alterations

A step-by-step guide to unique clothing alterations can transform your wardrobe without the need to buy new pieces. Whether you want to change the fit of a garment or add your personal touch, knowing how to alter clothing is essential for any DIY fashion enthusiast.
Assessing Your Clothing
Start by examining the clothing item you wish to alter. Determine what changes need to be made. Are the sleeves too long? Is the waistline too loose? Understanding what you want will make the process go more smoothly.
Gathering Supplies
Once you’ve identified the alterations, gather your supplies. You’ll need:
- Measuring tape: to get accurate measurements.
- Chalk or fabric marker: for marking areas to be altered.
- Needle and threads: in colors matching your garment.
- Pins: to hold fabric in place while sewing.
Having everything ready will make your alterations easier.
Making Simple Adjustments
For a simple hem adjustment, follow these steps:
- Try on the garment and determine where you want the new hem to be.
- Mark this point with chalk or a fabric marker.
- Remove the garment and measure down from this mark, adding an inch for folding.
- Cut off the excess fabric if needed, then fold the hem up and pin it in place.
- Sew along the fold with a needle and thread or use a sewing machine.
By following these steps carefully, you can achieve a professional look without spending too much time or money.
For more complex alterations, like taking in a dress, you would follow a similar process—marking, cutting, and sewing. This guide will give you the confidence to tackle any clothing adjustment. Embrace the process, and enjoy expressing your style through personal alterations.
creative ideas for upcycling Shein pieces
Exploring creative ideas for upcycling Shein pieces can breathe new life into your wardrobe. Instead of discarding old clothes, transforming them into something fresh and stylish not only helps the environment but also showcases your personal flair.
Transforming Basic Items
Start with simple alterations to basic Shein items. For example, an oversized t-shirt can be cut into a trendy crop top. Here’s how:
- Cutting length: Use fabric scissors to trim the shirt to your desired length.
- Adding flair: Consider adding fringes or lace to the bottom hem for a unique touch.
- Designing graphics: Iron on cool patches or create custom designs using fabric paint.
These small changes can make a significant difference. Don’t be afraid to experiment with different styles!
Mixing Patterns and Fabrics
Another exciting approach is to mix and match different Shein pieces. Try combining a patterned top with a solid-color skirt. You can even sew two different garments together to create a one-of-a-kind piece. Keeping these points in mind will make the process seamless:
- Color balance: Ensure the colors complement each other.
- Texture variety: Mix materials like denim and cotton for depth.
- Layering: Add layers for a more dynamic look.
Innovative sewing techniques can also aid in merging these styles smoothly.
DIY Accessories
Don’t forget about creating accessories from Shein items! A pair of old jeans can be used to make a fun bag. Simply follow these steps:
- Cut the jeans to your desired size for the bag body.
- Fold the top over and sew it for durability.
- Add decorative elements like beads or embroidery for personalization.
Creating accessories not only yields exciting results but also gives new purpose to items that may have gone unnoticed.
Through upcycling Shein pieces, you are encouraged to think outside the box. Embrace your creativity to turn the ordinary into extraordinary and develop a wardrobe that reflects your unique style.
how to share your DIY creations and inspire others
Sharing your DIY creations is a wonderful way to inspire others and build a community around creativity. Whether you want to showcase your unique pieces or share your methods, there are plenty of great ways to get your work seen.
Utilizing Social Media Platforms
Social media platforms are perfect for sharing visual content. Consider creating an account dedicated to your DIY projects. You can utilize:
- Instagram: Post high-quality photos of your creations along with detailed captions about your process.
- Pinterest: Create boards that feature your work, linking back to tutorials or blogs.
- Facebook Groups: Join DIY communities where you can share your work and engage with like-minded individuals.
Each platform has its strengths, and finding the right one for your style can help increase your visibility.
Creating a Blog or Website
If you’re passionate about DIY, consider starting a blog or a simple website. This allows you to:
- Document your process: Write step-by-step guides so others can learn from your experiences.
- Share tips and tricks: Help your readers improve their DIY skills.
- Build an audience: Encourage visitors to subscribe or follow for updates on your latest projects.
A blog gives you a creative space to share not just finished products, but also the journey and challenges behind them.
Hosting Workshops or Online Tutorials
Another fantastic way to share your DIY creations is by hosting workshops. Consider these formats:
- In-person workshops: If you have space, invite friends or local community members for a hands-on experience.
- Online tutorials: Use platforms like Zoom or YouTube to share your skills with a wider audience. Make sure to engage with your viewers, answering questions as they arise.
By teaching, you not only share your creativity but also empower others to unleash their potential.
Through sharing your DIY creations, you can inspire and connect with others. Each platform allows you to build a network of enthusiasts who can learn and grow together in the world of crafting.
In conclusion, sharing your DIY creations is a great way to connect with others and inspire them to express their creativity too. From using social media to host workshops, there are countless ways to get involved and build a community. Remember, the journey of DIY is not just about the final product, but also about enjoying the process and encouraging others along the way. So, gather your tools, unleash your creativity, and start sharing your unique designs today!
FAQ – Frequently Asked Questions about DIY Fashion and Upcycling
What are the best social media platforms for sharing DIY projects?
Platforms like Instagram, Pinterest, and Facebook are great for showcasing your DIY creations due to their visual nature.
How can I start a blog about my DIY projects?
You can start a blog by choosing a platform, documenting your DIY process, and sharing tutorials and tips with your audience.
What can I do in DIY workshops?
In DIY workshops, you can teach others various crafting skills, share techniques, and inspire creativity among participants.
Why is it important to connect with a DIY community?
Connecting with a DIY community encourages sharing ideas, gaining inspiration, and receiving support, helping you improve your skills and creativity.


